The latest v4.10 release of the X-T2 software includes a new feature to do focus stacking. Focus stacking is an advanced photography technique where images are captured with different focus points and later combined in software to create a sharp image with more depth of field (DOF) than would be possible with a single exposure.
First a bit of review:
- Depth of Field or DOF is the distance between the closest and farthest objects in a photo that appears acceptably sharp.
- The size of the DOF is determined by the lens focal length, the distance to the subject, and the aperture. The closer to the subject and the wider the aperture, the smaller the DOF.
- The DOF can be almost infinite when photographing a landscape using a wide angle lens with a small aperture. It can be small fractions of an inch when doing close up photography with a macro lens.
- It's not always possible to get all the subject within the DOF in a single shot.
Here's an example of a shallow DOF.
 |
| 60mm macro lens, f/2.4 about 20 inches from the subject |
In the above example, I was focused on the right edge of the glass face of the watch.
 |
| Zoomed in single image |
You can see that the scratches on the right edge of the glass are in focus but the blue dial face is not.
I really wanted to learn how to use this new feature on my camera but it's so new there is little information available on how to do focus stacking on the X-T2 camera. I decided to do some experiments on my own to see if I could figure this out.
There are four settings you must make to use focus stacking on the X-T2 with version 4.10:
- Turn on focus bracketing using the menu
Shooting Setting > Drive Setting > Bkt Setting > Bkt Select > Focus Bkt - Set the focus bracketing settings
Shooting Setting > Drive Setting > Bkt Setting > Focus Bkt
This is where the guesswork comes in. You have to set the number of frames to shoot, how much to move the focus point between frames, and the time between frames. More on that below. - Turn the shooting dial on the top left of the camera to Bkt
I picked my old beat up wrist watch as my test subject. It's picked up a lot of additional texture over the years. I used the Fuji 60mm macro lens set at f/2.4 for my tests. I could have gotten better results with an aperture around f/5.6 that can produce sharper images, but I wanted to work with a small DOF for my experiments.
With the camera about 20 inches from the subject I tried different variations of starting focus point, number of frames and step size. I chose a 1-second interval. This can be set between 0 and 10 seconds. A 2 - 3-second interval would minimize any camera movement caused by the shutter.
It took several attempts before I found the right combination for this shot.
- Starting focus point - the right edge of the glass face. Plenty of scratches to focus on here.
- 30 frames
- A step size of 4.
If I used fewer frames or a smaller step size the DOF wasn't big enough to cover the watch. It took 30 frames at a step size of 4 to generate a DOF that covered the part of the watch that was visible. The DOF didn't extend past the back edge of the watch.
 |
| 30 images stacked into one |
It's not easy to see the sharpness in the above image.
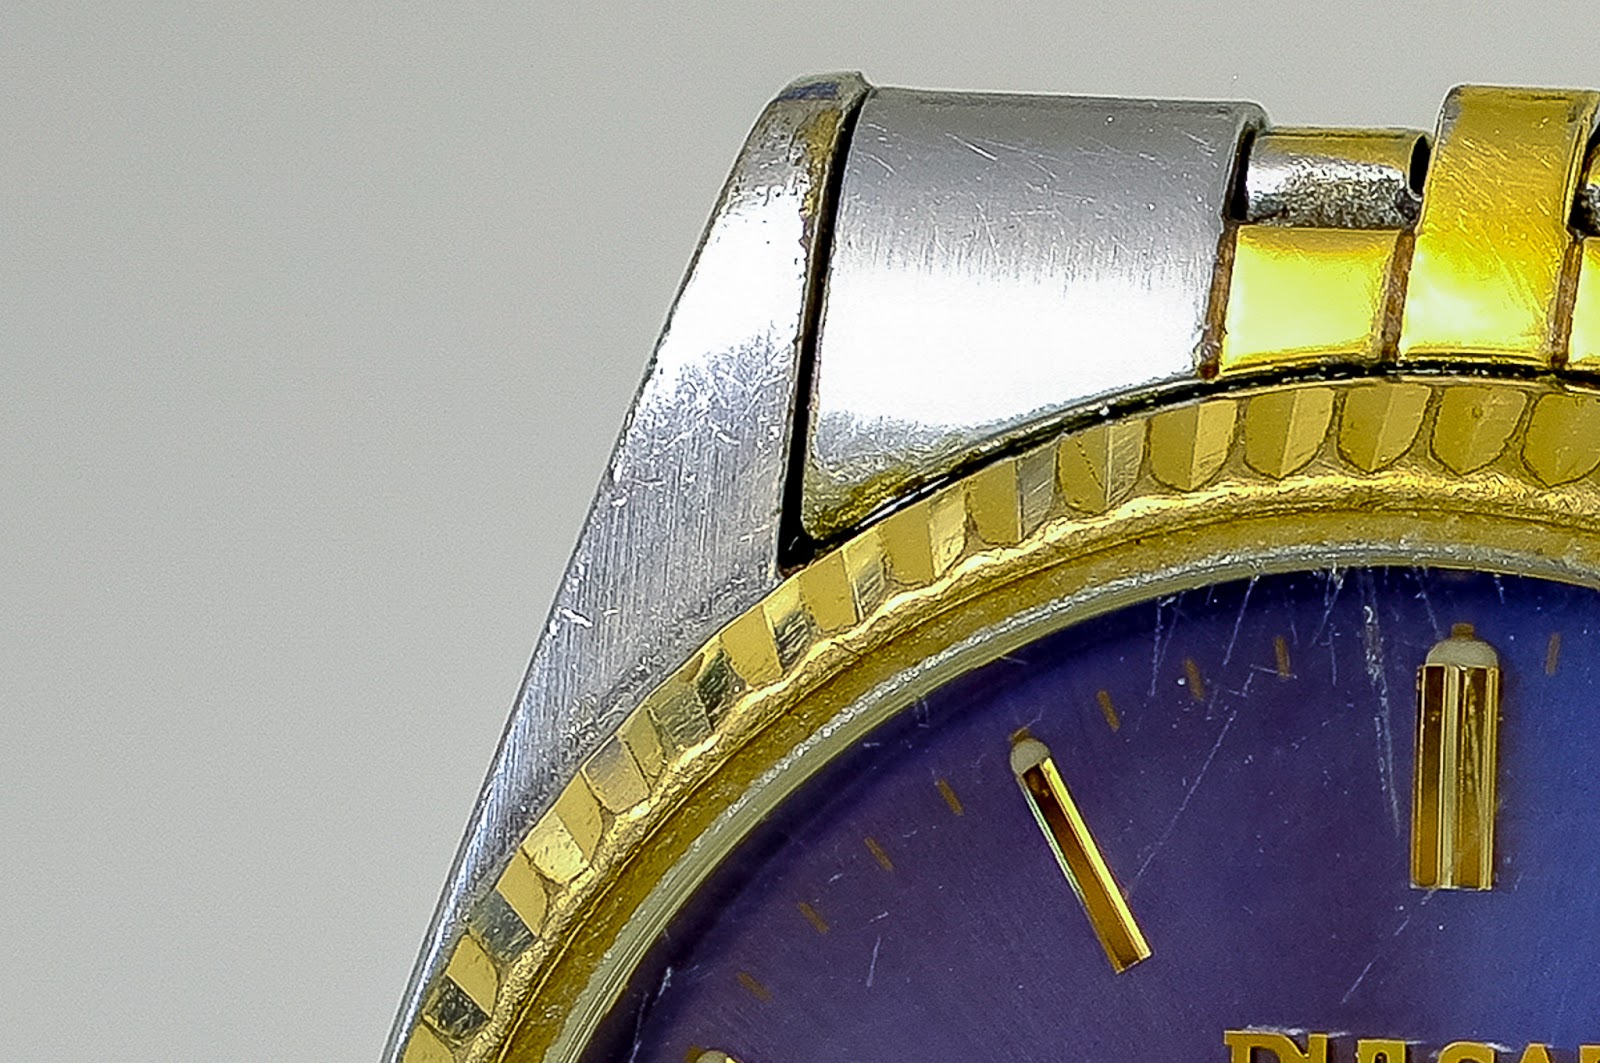
 |
| Zoomed in focus stacked image |
Here's the right edge of the stacked image. Compare it to the cropped image above and you can see the difference in focus sharpness.
You can see from the second crop that the stacked image is sharp across the entire subject.
 |
| Part of watch farthest from the camera |
I used Photoshop to combine the 30 images into a stacked image. Others have written about how to do this so I won't get into that here. Here's the tutorial I used. In the past, I've used Helicon Focus software for stacking. It's a much more powerful tool, but it costs $30/year or $115 for life. If I do more focus stacking I'll probably get a copy again.
This was just an experiment to get a handle on the process and settings. I'm going to do some more experiments with different subjects, conditions, lenses, etc. I've added a few other examples below.
 |
| 30 steps, step size 6, f/4.0, 60mm macro |
 |
| 30 steps, step size 9, f/5.6 |


