This post is for photographers who edit photos using Adobe Lightroom or Photoshop. In June of this year, Adobe released a new version of Lightroom and Adobe Camera Raw that had this cool new feature called Dehaze. It does exactly what you would expect, remove haze from a photo. Here's an example.
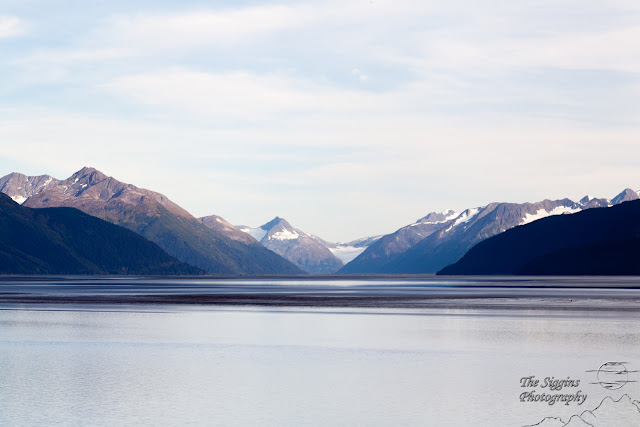
 |
| Unprocessed RAW Image |
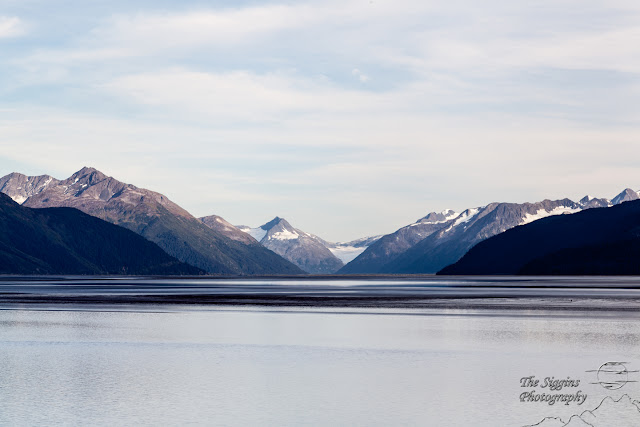
 |
| Contrast Adjusted |
In the first version I adjusted the tone curve and contrast slider to add some contrast to what was a pretty flat blah photo. It was better but still pretty blah.
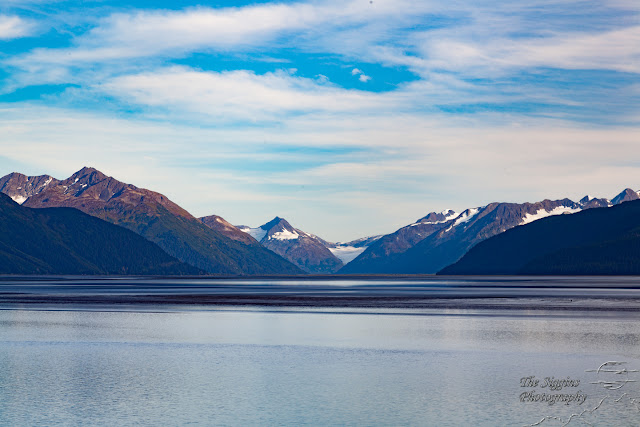
 |
| Contrast and Clarity Adjusted |
I then increased the clarity to +45 to see if I could clear it up some more. It was better but still not worth saving. In the past I would have passed over this one.
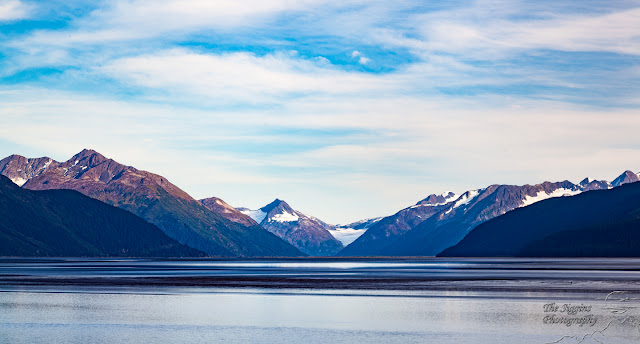
 |
| Dehaze Applied |
I then started over and only adjusted the Dehaze slider. No contrast or clarity adjustments. Pow! This is a photo worth saving.
With the haze removed I then cropped, adjusted the tone curve, contrast, clarity, sharpness and added a slight vignette and had a much better photo.
 |
| Final Version |
-- Hot Off The Presses --
Adobe just released an update and now you can apply the dehaze filter to local adjustments such as radial filter, graduated filter, and brushes. Check out this
article
The dehaze feature is available in Lightroom CC and Photoshop CC. I don't know if it is available in the non CC versions or if it ever will be. Adobe wants people to move over to CC and start paying the monthly fees so I won't be surprised if they don't add this really cool feature.


No comments:
Post a Comment