― Roy T. Bennett, The Light in the Heart
Light is the most important part of photography. Without it, there would be no image, no memories, no joy in a photograph. But, too much or too little light can be detrimental to our photos. Understanding light is key to making better photos.
Our cameras don't understand light. They have powerful computer processors that measure all the light coming in through the lens and hitting the sensor, but they don't know anything about the subject, what is important in the photo, or what is unimportant. The software developers who program those processors write algorithms to take all the inputs and make a decision on the three factors that make up the exposure triangle - shutter speed, aperture, and ISO. Depending on your camera settings one, two or all three of these are constantly being adjusted depending on the light the camera sees at that instant. Without knowing your composition your camera can sometimes make bad decisions.
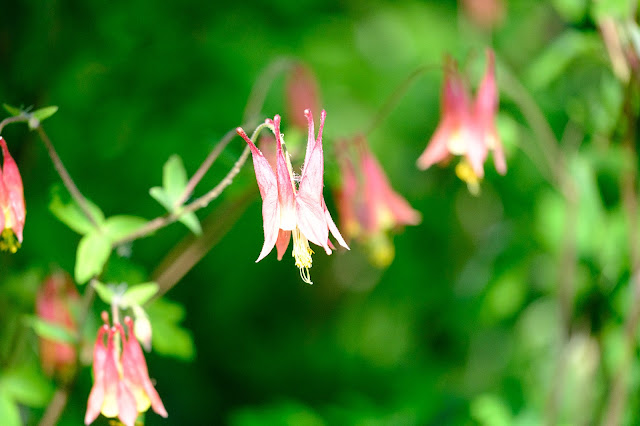
Take this photo as an example. The conditions were harsh. It was a bright sunny day with harsh direct light. The breeze was blowing and the Columbine flowers were in constant motion.
 |
| 1/4000 sec, f/2.8, ISO 1600 |
I was shooting with an aperture of f/2.8 to create a shallow depth of field making the center flower stand out from the background. The high ISO was to get a very fast shutter speed to freeze the motion of the flowers. The camera saw all the light and decided on a shutter speed of 1/4000 of a second. Even with that fast shutter speed, there was too much light. Although the overall exposure was not bad, the main subject was overexposed and the photo was ruined.
There are a number of ways to fix this, and none involve post-processing (editing) on a computer later. If you are comfortable shooting in full manual mode, you set the aperture, shutter speed, and ISO while keeping an eye on the histogram. My personal preference is to stay in aperture priority mode, where I spend most of my time, set the ISO, and let that advanced processor in the camera figure the shutter speed at that instant. Remember I said the flowers were constantly blowing around. That made the light constantly changing. Instead of setting the shutter speed myself I gave the camera a hint that the exposure needed to be turned down.
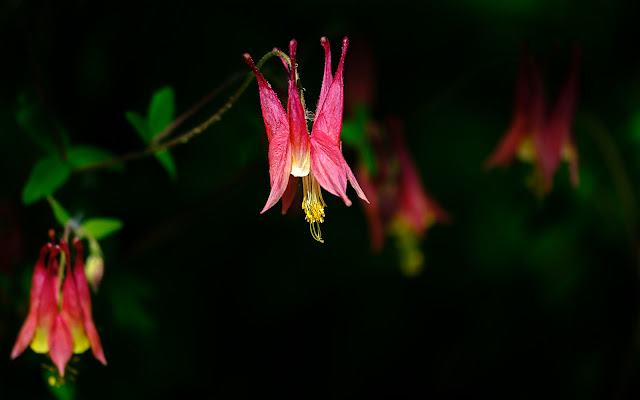
Almost every camera (even some cell phones) has a setting called exposure compensation. It is often a button on the top or back of the camera that has a +/- symbol. Some cameras have this setting buried down in a menu. This typically only works when the camera is in Program, Aperture Priority, or Shutter Priority mode. By using exposure compensation I was able to tell the camera to alter the calculated exposure by a given number of stops. In this case, I dialed in a -2 EV exposure compensation and shot again. I also lowered the ISO to 400 because I didn't need it that high to get the shutter speed I was wanting.
 |
| 1/6000, f/2.8, ISO 400 |
A common exposure problem occurs when the background is brighter than the subject. By default, the camera will expose so the subject is dark and the background is correct, like in this photo.
By dialing in a +1 2/3 EV exposure compensation I am able to brighten the bird so that details in the feathers and eyes can be seen. By making this adjustment the sky becomes overexposed. This is fine because the subject is the bird, not the sky.
The key to knowing when to adjust the exposure compensation is knowing what the subject is and if it is properly exposed. If the subject is too bright or too dark, throw in some exposure compensation to properly expose the most important part of the photo.
You may be tempted to assume you can correct the exposure later in post-processing. Don't be fooled. Parts of your photo that are overexposed often cannot be brought back and brightening underexposed photos can introduce digital noise. It's much better to get the exposure right when you make the photo than to try to correct it later.
If you find this tip useful please subscribe to my blog to get future tips emailed to you. If you have questions, feel free to contact me and I'll do my best to answer them.


No comments:
Post a Comment