Showing posts with label color. Show all posts

Tuesday, July 25, 2017

Power of Color in Black and White Photos

Black and white photography can produce some captivating and artistic photos. By removing color from the image you emphasize the tonality, geometric shapes, and composition of the photo. Of course, not all images work in black and white. A brilliant sunset loses its a beauty when all the color is removed. I find converting an image to black and white to be a fun creative challenge that can result in an image to be proud of.

Most digital cameras and even some cell phones can take photos in black and white. If you let your camera do the conversion to black and white it will store the image without the color information. You have now limited your ability to adjust the image later.  My suggestion is to always capture your images in color and convert to black and white in post processing.  Here's why.

The best way to explain what I am talking about is by showing an example.  The video below shows how powerful the color information is behind a black and white photo.


I hope that video is helpful.  Making videos is new for me and was a little intimidating.  I think I need some practice.

Here are some more examples of converting a color photo to black and white.

Sample Number One - Street Portrait

I made this photo of Carrington Kay at the Music On The Square in Jonesborough TN. I wasn't in a great position to make photos and was more interested in enjoying the music anyway. The musicians were in the shade but the background building was still in the sun. I edited the color version to deemphasize the background and focus on the two individuals, however, the red brick still grabs your attention more than I wanted it to.
Color
I used Lightroom to convert the image to black and white using the color sliders like I did in the video. The red brick wall no longer grabs the viewers attention allowing the musicians to be what your eye sees first.

Converted to BW in Lightroom
Click on the first image to zoom in then use the right and left arrow keys to flip through the different versions to see the differences in each.


Sample Number Two - Dull Sunrise

I said earlier that sunrises or sunsets are not typically what I would convert to black and white. In the example below the sunrise colors were very muted.  In fact, there is very little color in this image.
Fuji Provia Profile
When you shoot color in RAW format you can apply camera profiles later in Lightroom. In this example, I used a profile that simulates the Fuji Acros B&W film.  Applying this profile also changes the contrast and introduces simulated grain to make the digital image appear as if it was shot on Fuji Acros B&W film.

Fuji Acros Profile
By converting this image to B&W I removed the color distractions and emphasized the repeating patterns and composition. The surface of the water was blurred by using a 9-second exposure.

I really like the Acros profile and it's easy to apply in Lightroom.  If I don't like the result, it is easy to switch back to the default Provia color profile.

Sample Number Three- Timeless Scene

One more example of converting a color image to black and white.  In this case, the crisp color image appeared too new for the subject, which looked like it was set in the 1950s.  
Produce Stand in Color
 By converting to B&W the resulting image fits better with the subject.
Converted to BW in Lightroom
There are a number of ways to convert a color image to black and white.  I have shown you two ways in Lightroom. Other tools I use are Silver Efex Pro 2 from Google (Nik) and On1 Photo RAW.

Converted to BW in Silver Efex Pro 2 High Structure (Harsh) preset.


Converted to BW in On1 Photo RAW 2017 - Black & White Rugged Preset
These are just a few tools available for converting to B&W. There is an infinite number of ways to adjust an image when converting.  How you convert your photos is up to you. Use your creativity to express yourself and tell a story with your photos. Just make sure you capture the image in your camera, in color, preferably in RAW format.

Do you find these blog posts worth the time it takes to read them? Is there something you would like to see on the blog? Send me a note and give me some feedback.  I really do appreciate the feedback.

Sunday, August 10, 2014

Scouting For Ideas

I'll be leading a photo outing to South Holston Dam near Bristol Tennessee on August 16 for the Eastman Camera Club.   Anyone is welcome to join us.   Trip details are available at http://eastmancameraclub.blogspot.com/2014/07/next-camera-club-outing-saturday-august.html   Send me an email if you have questions - r.siggins@charter.net

It's been a couple years since I was up there and I decided I had better do a little scouting before next Saturday.   I need to have some suggestions for photography to offer.  Here's what I found.

The wildflowers are not the primary photo opportunity in mid-August.  The Cut Leaf Coneflowers that bloom along the river banks have seen better days.   There were a few Jewelweed or Touch-Me-Not still in bloom, but they were not growing where they were easy to get to.

TVA was generating so the water flow was pretty high over the Weir Dam and after a couple cloudy rainy days the sun was out making it difficult to take long exposure shots of the flowing water.

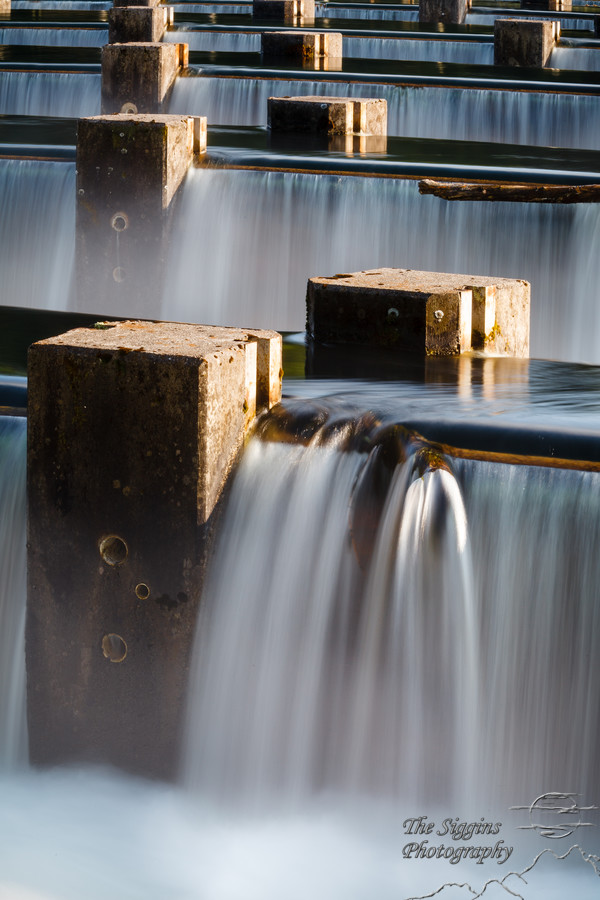
What I found was some really cool reflections and patterns.

Hanging On

Golden Reflections

Cut Leaf Coneflowers
Golden Flow

Stump - Long Exposure

Reflections

Repeating Patterns

Weir Dam Patterns

If you join us Saturday, here's some suggestions:

Stuff to bring:

  • A picnic dinner.  We will eat and have some social time at the picnic area before starting our photographic journey.
  • A tripod.  You will want to try some long exposures of the water flow.
  • A polarizing filter.  It can make a tremendous difference with the reflections and the fog that rises off the river in the evenings.
  • A long lens.   I found I wanted something longer than 200mm for many of my shots.   Except from the top of the dam, there are not many wide angle shots.
  • A neutral density filter if you have one.  It will cut the light and allow you to get longer exposures and blur flowing water.
  • A hat or something to shade the front of your lens.   Late afternoon sun can cause flares in your pictures if it shines on the front of the lens.
  • Comfortable shoes.  There is a nice 1.8 mile trail around Osceola Island.  This is where we will spend most of our time.
  • Bug spray.  There were a few pesky bugs but nothing bad.
Things to look for:
  • Reflections in the surface of the water.  The greens will give way to golden reflections as the sun gets lower.
  • People fishing, canoeing, etc.  People can add interest to your photos.
  • Patterns
  • The little details
  • Light - no telling what the light will be like when we get there.  We'll work with what we get.  If we're lucky there will be some clouds, but enough light to give the warm light of sunset. 
  • Fog - sometimes the fog off the river is very thick.   This creates perfect soft light.  Watch for sunbeams in the fog.
  • Wildlife.  I haven't seen any wildlife there, but it should be a good place for herons and other birds.
If you are interested in joining us meet me at the Colonial Heights location or up at the Weir Dam.   If you have questions just email me at r.siggins@charter.net

Saturday, January 18, 2014

Fooling Your Camera's Auto White Balance

All light has color characteristics.  Our eyes and brain have been created to discern and adjust for most color differences, which we never notice.  However, the sensor and high powered computer in our digital cameras are not as smart as we are and can be fooled.

The color of light is expressed as a temperature in degrees Kelvin.  Sometimes it's warm, like the sunlight at sunrise.  Other times it's cool like the sunlight on a cloudy day.  Artificial light also has color.   Florescent  bulbs have a cool blue tint while tungsten incandescent bulbs have a warm yellow tint.

Your digital camera has a feature called Auto White Balance (AWB) that tries to measure and adjust for these differences in light color so things that appear white to your eye are white in your photo.   Modern cameras do an amazing job and get this right most of the time, however they can be fooled.

If a scene is dominated by one color the auto white balance function can be fooled into assuming that the light has a lot of that color in it. This can result in an incorrect white balance and an undesirable color cast in your photo. The two photos below show one case where the camera was fooled.

Auto White Balance

Daylight White Balance

About 3/4 of this photo is dominated by a strong yellow color from the field of Canola (Rapeseed).   In auto white balance mode the camera senses all this yellow and thinks the color temperature of the light is warmer than it really is.   The camera makes an automatic adjustment (the auto port of AWB) to make the photo cooler.  As a result, the photographer's skin has a sickly blue color.

In fact, the photo was taken on a bright sunny day around mid-day and the light was cooler (bluer) than the camera thought.  In the second photo I changed the white balance from auto to Daylight.  If you compare the two photos you can see that the photographer's skin tone in the second photo is much more natural.

So, when do you rely on Auto White Balance and when do you go to manual white balance?  Here's what I do.  Most of the time I don't care about the white balance setting on my camera because I almost always take my photos in RAW format rather than JPEG.  JPEG format has the camera's color adjustments applied, but RAW does not.  With a RAW file I can correct the white balance when editing the photos on my computer.  In fact, this is how I created the two example photos.  I was able to change the white balance setting on the RAW file to create the two different versions.  When shooting in JPEG mode it is very difficult to correct the white balance once the photo is taken.

When shooting in JPEG mode I will be aware of the color cast of the photo I'm about to take and decide if I need to override the Auto White Balance.   As I said, most cameras do a pretty good job on auto mode so this doesn't happen often.

Devices such as Expo Discs can be used to determine the color temperature of the light and creating custom white balance settings.  This is a more advanced topic that may get covered in a future post.