Showing posts with label lightroom. Show all posts

Wednesday, December 27, 2017

Lightroom CC Auto Exposure

Lightroom has always had an Auto Exposure feature that attempted to fix an image exposure by analyzing the image and automatically changing the tone sliders. I never used this feature because it didn't come close to what I considered the correct adjustments.  Adobe recently released Lightroom CC Classic version 7.1, which is supposed to make major improvements to this feature.  I was interested to see if it is really better.

According to Adobe, the new "Enhanced Auto feature has been optimized by machine learning." to automatically apply the best edits for the following slider controls: Exposure, Contrast, Highlights, Shadows, Whites, Blacks, Saturation, and Vibrance. Using an advanced neural network powered by Adobe Sensei, our artificial intelligence (AI) and machine learning platform, the new Auto Settings creates a better photo by analyzing your photo and comparing it to tens of thousands of professionally edited photos to create a beautiful, pleasing image."  The button is no longer called the “Auto Tone” — now it’s called “Auto Settings” because it goes beyond just the tonal sliders in the Basic panel by adding Vibrance and Saturation into the mix. So in theory, the auto button should adjust my photos to what a professional photo editor would do.  Let's see.

Example 1 
Original Unedited Image

Original Tone
Lightroom 7.0 Auto Tone

Version 7.0 Tone

Lightroom 7.1 Auto Tone

Version 7.1 Tone
One reason I never used the earlier versions of the Auto Tone feature was that it always seemed to make the image too bright. You can see this in the version 7.0 example above. Scott Kelby called it the "overexpose button." The new version does not seem to have that problem.

The official differences from the old Auto-Tone are:

  • The new Auto tone will also adjust the Vibrance and Saturation in addition to Basic panel tone controls.  It does not touch the Clarity setting.
  • The analysis is done on the cropped image, ignoring what is outside the crop. If you crop after applying Auto, the Auto button will re-activate – click on it again to redo the analysis.
  • The analysis also takes into account your existing white balance and camera profile.

One thing I have noticed in my testing is the analysis can take a few seconds to complete.  The Auto button is disabled until it is complete.  This is not listed in the "official differences".

Of course, testing on one image is not enough.  Here are a few other examples of the unedited and 7.1 auto results.

Example 2 - an easy one.  Click on one of the images and use your arrow keys to flip back and forth between the two images.
Original

7.1 Auto Tone
The sky was too light in this example and auto brought down the highlights.  It also dropped the blacks -14 and reduced the contrast by -17.  It's not exactly what I would have done, but still a good starting point for future refinement.

 Example 3 - click this image to see a larger side by side comparison.
In this more difficult example, there was a great deal of contrast in the original image.  The auto turned the contrast down -20, dropped the highlights -63 and brought up the shadows +44 to even out the image.  Really not too bad.

My final test image is the hardest yet.  It was taken under extremely difficult lighting conditions inside a glass factory.  The room was dark but the molten glass was very bright.  The auto tone didn't handle this image very well.

  Example 4
In my opinion, it made the image too dark.  I guess that is not one of the tens of thousands of professionally edits that were fed into the artificial intelligence.

In the end, no automatic feature is going to be correct every time, but this version seems to be much better than the previous versions.  I plan on using the new Auto Settings feature when I start my edits.  It can give me a good start with just one click.

Sunday, October 23, 2016

Product Review - Sleeklens Presets and Brushes for Lightroom

I was recently given an opportunity to review a set of develop presets and adjustment brushes designed for use in Adobe Lightroom.   The folks at sleeklens package their presets and brushes into what they call workflows.  The workflow I reviewed was "Through The Woods".

Sleeklens provides a series of video tutorials on how to use the Through The Woods workflow.  You can view those here - https://sleeklens.com/product/landscape-lightroom-presets/

What makes these different from the million and one other presets available?  The biggest difference is these are designed to be used in a workflow.  Presets are applied from global to more targeted changes.  Then the brushes are used for changes to specific areas of an image.   These all work together in a consistent fashion.

They are also stackable - each preset only changes specific settings for the named effect without changing other develop settings.   This allows you to apply multiple presets to a photo.

To evaluate the presets and brushes I picked a few images from a recent trip and edited them.  Here are the results.

If you click an image you will be able to view it larger and use the arrow keys to walk through each step.

Step 1 - Unedited RAW image from a Canon 5D Mark II, 24-105mm @105mm, f/14, 0.5 second, ISO 100.
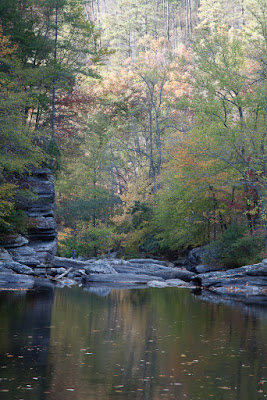
Unedited Raw Image


Step 2 - All In One - Shine Into the Sunset preset applied.
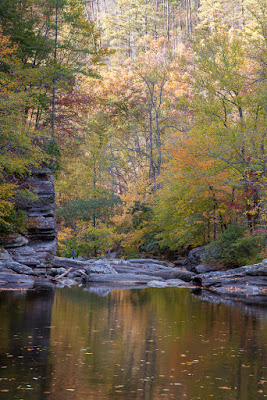
Shine Into the Sunset Preset
In one click this preset changed contrast, highlights, shadows, whites, blacks, clarity, vibrance, overall saturation, orange saturation, shadows toning, sharpening, and noise reduction.  This is definitely a nice improvement applied in just one click.

This brings up one issue I have with presets in general.  This preset made these detail changes

That's more sharpening than I typically use.  I applied the preset to multiple photos from different cameras at high and low ISO settings. In each case, the sharpening and noise reduction were the same, which may not be appropriate for all photos. When I applied the preset to an image taken on a Fuji XT-1 at ISO 1000 the level of noise introduced was not acceptable for me.   I would have to reduce the sharpening and increase the noise reduction on that image. You have to be careful with any presets to make sure they aren't making changes you don't want.

Step 3 - Base - Autumn Colors.  This preset made changes to the Hue, Saturation, and Luminance sliders to emphasize the warm colors.  It also changed the Split Toning, overwriting those changes that were done in step 2.
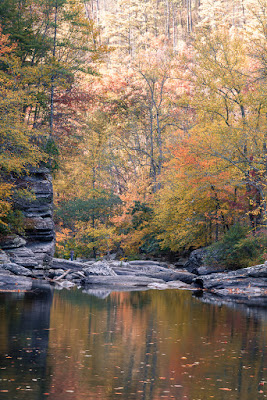
Base - Color - Autumn Colors Preset
I really didn't care for the color in this step.  I hit control-z to undo that preset.

Step 4 - Because the All In One and Base presets were changing too many things at once, I stepped into the Exposure presets.  Applying the Exposure - Less Highlights changed the Tone Curve to reduce the Highlights and Lights. I like what this did for the brighter areas at the top of the image.
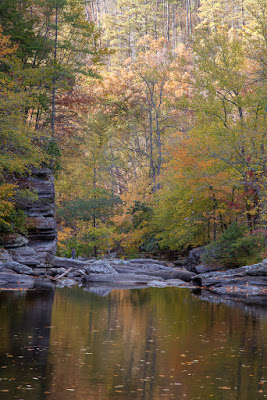
Exposure - Less Highlights
Step 5 - Making it Pop!   I wanted to bring out the autumn colors and make them really pop. Clicking the Warm It Up preset didn't do what I expected.  Instead, it changed the Split Toning and made the image less warm. I backed this change out.

I then tried Polish - Punch It Up, which bumped up the Vibrance and Saturation.  It also reduced the Clarity, which I didn't expect.  I did like the effect and decided to keep it.

Step 6 - Vignette.  I almost always apply a gentle dark vignette to my photos.  I tried the Vignette - Medium Black and Vignette - Subtle Black presets and decided on something in between.   I manually adjusted the Amount on the Post-Crop Vignetting to split the difference.
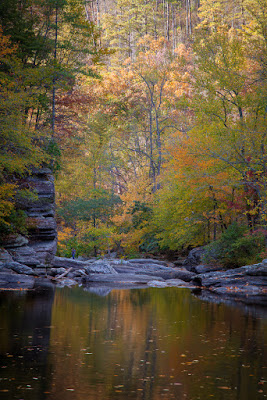

Punch It Up and Dark Vignette Applied
At this point, I decided the image looked pretty good and was where I wanted the image as far as presets.   Time to try out the adjustment brushes.

Step 7 - Adjustment Brushes.  Adjustment Brushes are one of the most powerful tools in Lightroom and one I use often.  Lightroom comes with a handful.  Sleeklens adds several more.  I applied the following brushes:

  • Reduce Highlights to the upper center where the forest was still a little bright.  This didn't go far enough so I dropped the exposure setting on the brush a little.
  • Intense Sunlight to some of the trees where the leaves had started turning golden.   This brush warmed the color (temp), brightened the highlights, bumped the saturation and applied an orange color.  This was a bit too intense for me so I reduced the saturation of the orange color.
  • Subtle Sunset Haze - I applied this to some of the trees to reduce the contrast, bump up the highlights, shadows, clarity, and saturation, and apply a light orange color.  This is a more appropriate brush for this image.

There are many other brushes that I tried, but these three were all that I felt I needed on this image.   Here's the final result.
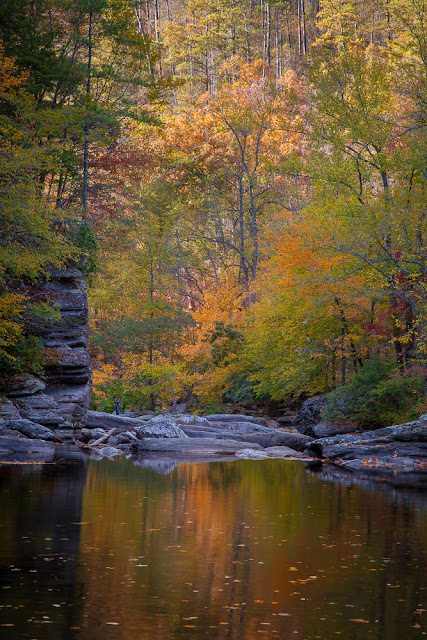
Final

That's just one example.  Here are some before/after images


Before
After


Before

After


Before


After


OK, if you have read this far you are looking for the bottom line.   Everything that I did with the sleeklens presets and brushes could have been done manually.   As a long time Lightroom user I can zip through post processing pretty fast and typically don't use presets.   I do use brushes and having the sleeklens brushes will improve my productivity and creativity.

If I was new to Lightroom and didn't know how to manipulate all the myriad of adjustments to get a particular desired effect then the presets would be useful.  They are short-cuts.  Short-cuts will get you to somewhere faster, but may not get you what you want in the end.  Even beginners should not rely on presets entirely.

All the sleeklens workflows, including Through The Woods, sell for $39 each.  They also offer money saving bundles.   Is it worth it?   That's a tough call for me. An experienced Lightroom user may not find the workflows save them much time.  Casual and beginner Lightroom users will probably find the workflows to be a great boost to their productivity and creativity.

There are many free presets that can be downloaded and installed at no cost.  Just google "free lightroom presets" or "free lightroom brushes" and you will be presented with more options than you know what to do with.  Why would you pay $39 for a set when you can find others for free?  By purchasing the sleeklens presets you get a set of tools that work together well.  The free stuff, maybe not so much.

Finally, I want to say that sleeklens provided a free copy of the Through The Woods workflow in return for an honest review.  I have not been influenced by sleeklens and have given my honest opinion here.

I welcome questions.  Just drop me a note on the Contact Me page on my main gallery - http://www.thesiggins.com/


Monday, October 5, 2015

Adobe Lightroom and Photoshop Dehaze Feature

This post is for photographers who edit photos using Adobe Lightroom or Photoshop.   In June of this year, Adobe released a new version of Lightroom and Adobe Camera Raw that had this cool new feature called Dehaze.  It does exactly what you would expect, remove haze from a photo.  Here's an example.

Unprocessed RAW Image

Contrast Adjusted
In the first version I adjusted the tone curve and contrast slider to add some contrast to what was a pretty flat blah photo.   It was better but still pretty blah.

Contrast and Clarity Adjusted
I then increased the clarity to +45 to see if I could clear it up some more.  It was better but still not worth saving.   In the past I would have passed over this one.

Dehaze Applied
I then started over and only adjusted the Dehaze slider.  No contrast or clarity adjustments.   Pow! This is a photo worth saving.

With the haze removed I then cropped, adjusted the tone curve, contrast, clarity, sharpness and added a slight vignette and had a much better photo.

Final Version

-- Hot Off The Presses --

Adobe just released an update and now you can apply the dehaze filter to local adjustments such as radial filter, graduated filter, and brushes.   Check out this article


The dehaze feature is available in Lightroom CC and Photoshop CC.  I don't know if it is available in the non CC versions or if it ever will be.  Adobe wants people to move over to CC and start paying the monthly fees so I won't be surprised if they don't add this really cool feature.

Sunday, November 3, 2013

Fixing lens problems when importing to Lightroom

If your lens is busted then Lightroom is not going to be able to help you out.  However, if your lens takes photos that are distorted, dark around the edges or have the deadly chromatic aberration then Lightroom can help.

No lens is perfect and they will all introduce varying levels of distortion to your images.  There are four kinds of lens correction Lightroom can do for you:
  • Barrel Distortion - the photo has a "bulging" effect, especially in the center
  • Pincushion Distortion - a squeezing of the center that distorts images in an inward sense.
  • Lens Vignetting - darkening of the sides and especially corners.
  • Chromatic Aberration - fringes of color along edges of dark and bright parts of the image
Lightroom comes with a database of lenses that include settings for correcting these problems automatically.  Because your camera embeds information about the camera and lens in the image file, Lightroom automatically knows what lens you were using when you took the shot and can apply the automatic corrections for that lens profile.

Lens Correction Panel in Lightroom 5.2

Here is an example of automatic correction of the shot with my 24-105mm Canon lens.


Before Lens Correction

After Lens Correction
It's not easy to see the difference without flipping back and forth (click on an image and you can then flip between them using arrow keys).  In the first version there is some barrel distortion that you can see by looking at the edge of the roof for the back corner of this store.  See how it curves up in the center?   This distortion is taken out in the bottom version and the room is straight.

The top version also has some lens vignetting that you can see shows up as darker areas of the sky in the corners.

Before
After 

Above is an example of Chromatic Aberration.  In the before version you can see a blue fringe at the edge of this bird's wing. In the second version I have clicked Remove Chromatic Aberration in the Lens Corrections Panel and the blue fringe goes away.   The CA will be worse when there is a strong sharp line between the light and dark sections, when the lens aperture is small, and with a lower quality lens.  If you do a Google search for Chromatic Aberration Examples you can see some better examples.


These are all nice features, but you don't want to have to turn them on for each image you are editing in Lightroom.  I have created a preset with Enable Lens Corrections and Remove Chromatic Aberration checked.  I then use that present when importing my photos.

Now when I import photos Lightroom will determine the lens and apply the appropriate lens corrections for me.   Give this a shot next time you are editing in Lightroom and let me know what you think.

I'm always looking for new blog ideas.  Have a question?  What to see some kind of example?  What do you want to see on this blog?   Just drop me a note to r.siggins@charter.net and let me know.

Wednesday, March 27, 2013

Should I shoot my black and white in color?

Many digital cameras today will take photos in black and white.  Sounds like a neat time saving feature.  If I intend for a photo to be a black and white image, why not let the camera convert it to black and white for me and save an editing step later?   Like most things, taking a short cut now will cause problems later.

When the image that comes out of the camera in black and white, all you have is black and white.  All the color information has been lost.  You can't tell a red from a green or blue.  Why do you care if it's a black and white?  If you plan on doing any editing of the photo, you do care about the colors.   Here's an example to illustrate my point.

Here's a color image shown in Lightroom 4

Although it was still winter when I took this, there are some colors here.  Blue sky, red bricks, green roof, and just a little green grass.   Now, here's the same image converted to black and white in Lightroom.


By default Lightroom will create a black and white image that maximizes the distribution of grey tones. Notice how the color channel sliders on the right have been automatically set by Lightroom.   Most of the time I use this as a good starting point.  In this case, I want to make this photo a bit more dramatic.

I start by making the sky more dramatic by increasing the contrast between the dark (blue) areas and the light clouds.  Because the color information is still there in the photo I can easily do this by lowering the blue channel by grabbing that slider and pulling it to the left.


Notice the difference in the sky.  If I pulled the slider all the way to the left the sky would be almost black, which may be dramatic but it does not feel natural.

Second I want to lighten the front of the Salt House.  I do that by adjusting the Red, Orange and Yellow sliders until I get the effect I want.  I also want to darken the roof a bit.  Because the roof is green I can easily do that by pulling the green slider to the left.


Sometimes the color I want to adjust is not a pure color but a mixture of several colors.  Lightroom has a cool tool for adjusting specific colors in an image.  At the top left of the B&W panel on the right is a small target.  Clicking on the target activates the target adjustment.  Put your cursor in the place in the image that contains the color you want to adjust, left click and drag the mouse pointer up to brighten that color or down to darken it.  When you do this you will see more than one slider move and some sliders will move more than others.  Click Done to turn off the targeted adjustment mode.

In this example the locomotive is a bit dark and some details cannot be seen.  I'd like to lighten it up a bit.  Because black is the absence of color you can not use the color channels to make this adjustment.  The same is true for white, which is all colors blended together.   The best way to adjust these is to adjust the region of the tone curve using the tone curve or tone sliders or to use the adjustment brush.

If I was working with a straight black and white image right out of the camera with no color information it would be difficult to impossible to make these adjustments. That's why you should always shoot in color and then convert to black and white later on the computer.

I used Lightroom for this example but it works the same in other photo editing packages, including Photoshop and Nik Silver Efex (now part of Google).

Remember, don't take short cuts when you capture an image.   It may sound like a good time saving step but you may not be able to get the end result you want if you short cut.  The same rule applies for good composition, exposure, and technique when taking a photo.  Get it right in camera without short cuts.

Friday, January 25, 2013

Is it real or is it Photoshop?


I recently saw an article on the 10 Myths About Photography by  Scott Bourne---Photo  Focus. 

Number 5 caught my attention - "If you do anything to a photo in Photoshop it's no longer a photo. Opinion - if it started its life in a camera it's a photo. Ansel Adams never used Photoshop, but he manipulated the Hell out of his pictures. There is no reality in photography. There never has been. It doesn't exist"

People ask me if I edit my photos.  The answer is yes.  I edit every photo I take.

A photograph is a two dimensional representation of a 3 dimensional world.   Photographers can arrange their composition to give more of a three dimensional feel but it's still on a flat screen or piece of paper.   They can make changes using Photoshop, Lightroom or other photo editing programs to make it look like it has depth.  They can also manipulate the photo to make it more pleasing.   How much editing is OK and where is the line?

Almost all digital photos have been manipulated. In fact, unless you take your photos in RAW mode, they have been manipulated by your camera before you see them.   By default cameras automatically adjust the color, sharpness, contrast, saturation, and possibly other photo settings.  This is done automatically, unless the camera has been set to store the images in RAW mode.  RAW images are uncompressed and unprocessed by the camera.  


The first version of this creek picture is the unprocessed RAW image.   It's not a bad photo but it lacks something and also has something I don't want.   The second version is edited in Adobe Lightroom to adjust to white space (color), vibrance (saturation), contrast, and sharpness.  I also darkened the trees at the top and darkened around the edges slightly.   These changes emphasize the flowing water and give the colors a little more pop.   In the original there was a twig sticking out of the water that was very distracting.   I used Photoshop Elements to digitally remove it.

Click the first image and you will get a window where you can go back and forth comparing the two versions.

If I had my camera on automatic it would have done some of these adjustments, such as white space, vibrance, contrast, and saturation, for me.   I prefer to turn off the automatic adjustments and adjust each one.

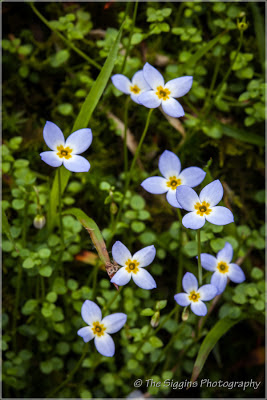
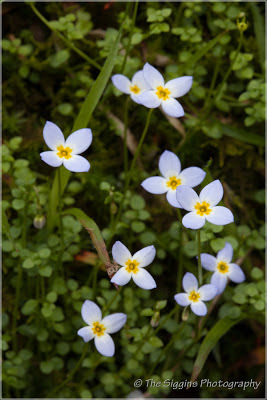
Here's another example of editing a RAW photo.   The first image is the unmanipulated copy and the second has been edited in Lightroom.   The color of the Bluettes is the edited version are more like what I saw.     I also darkened the corners and edges to draw the viewers eye to the center.

This third example is a bit more manipulated.   The first version is straight out of the camera and pretty dull.   This was a really cool scene but the camera didn't capture it the way I saw it.   I first cropped and straightened the image to make sure the barn is the obvious subject.  I also increased the clarity to draw the trees out of the fog and brightened the barn, also to draw attention to it.    The white balance and vibrance were also adjusted.  There was also some large white object to the right of the barn that was very distracting so I "removed it".


Which of these is more "real"?  The more important question is which is more interesting to look at?   The first may be closer to what was actually there, but I think the second is a more interesting photo.  Unless a photo is intended for documentary purposes, it usually can benefit from some manipulation.   The manipulation is what painters have done for centuries and in fact many of the guidelines used by photographers were first discovered by painters.   Photographers are artists and as artists can adjust a photo any way they feel will improve it.  


Friday, January 18, 2013

Post Processing Polarization

When I'm shooting outdoors I almost always have a polarizing filter on on my lens.  A polarizer is one of the most useful tools available for a landscape photographer.  It cuts the glare off water surfaces, windows, and other reflective surfaces.  It can cut the glare and darken leaves and flowers.  It gives a sky that rich blue color and makes clouds really pop.  The best part is the effect is adjustable.  Turn the filter to increase or decrease the polarization effect to get it the way you want it.  It's my favorite tool when shooting landscapes.

I don't use many other filters because you can simulate them when editing the images later, but a polarizer is not so easy to simulate.   If you have glare on water, windows, or leaves there's not much you can do about it after you take the photo.   It's always best to get the best image you can in camera and don't rely on post processing to fix problems later.


There is one polarizer effect that you can simulate in post processing and that's the blue skies.   I do this is Lightroom sometimes if for some reason I didn't have the polarizer on or didn't get the effect I was looking for.   I do this by using the Hue, Saturation, Luminance sliders.

I want to reduce the luminance (brightness) and increase the saturation of the blue part of the sky, without impacting other parts of the photo.   To do this I select Saturation and click the round target icon just under the word Hue.   I then use my mouse to click and hold in the blue part of the sky.  While holding the left mouse button down I drag the mouse up to increase the saturation of the color I clicked on.   You can manually move the blue slider but the color of the sky is often a combination of Blue, Aqua and even some other colors.  Using the target allows you to select the exact color combination you want to adjust.

Likewise, you can click the Luminance and repeat the process to reduce the brightness to get the effect you want.  Be sure to cluck the Done button when you're finished.


The two photos above are before and after I adjusted the saturation and luminance of the blue portion of the sky.   This pretty closely matches the effect you get from a polarizing filter.  Of course you might have problems with this technique if you have other blues in the photo that are close to the color of the sky.   I suggest trying this out.  Just be careful to not over do it.

If you have Nik Color Efex software you can get a similar effect using the Polarizer filter.   Here's the same photo with the polarizer applied in Nik Color Efex


The Nik software has a rotation slider simulating the effect of turning the polarizer filter to adjust the effect.  Again, be careful to not over do it.

These are a couple quick techniques to fix the sky if you didn't have a polarizer when you took the image.   Don't rely on this and other post processing adjustments.  Try to make the best photo possible when you take the shot.  You'll get consistently better photos every time.

Several people commented on my last post.  Thanks for letting me know what you think.  I love hearing from you and welcome questions or criticisms.   Let me know what you think and if you found this useful.


Sunday, March 25, 2012

View From Our Backyard

I was washing dishes Saturday afternoon and looked out the kitchen window to see this.


We get some awesome sunsets across that pasture and I've tried to capture them before.  Most of the time by the time I get my camera and tripod out, run outside, and set up the light is gone.   I've never been able to capture any of those light displays.  This time was different.  I had just gotten a new Canon 5D Mark ii the day before and it was sitting out where I could grab it on the way out the door.   I didn't bother with the tripod and decided to do the best I could without it.

The bright sky and relatively dark field was much to big of a dynamic range of light for the camera to capture.  Either the sky was going to be blown out bright white or the field and trees were going to be very dark.  I shot three exposures (-1 EV, 0, +1 EV) to capture the entire range of light.   I should have gone with a wider spread because the brightest part of the sky was blown out at -1.   After I made those shots I changed the settings and poof the light was gone!   Unlike the light in my last post, this time it only lasted a couple minutes.

I used ISO 800 and f/22 to try and get a star burst from the clouds.  At that setting I got shutter speeds of 1/20, 1/40 and 1/80.  I was hand holding with image stabilization on.  I had no idea if the three images would line up or if I had too much camera shake.

My workflow for this photo was longer than most:
  1. Ran the three exposures through Nik Define to remove the digital noise due to the ISO of 800.
  2. Combined them using Nik HDR Efex Pro using a Natural setting.  I used some control points to tone down the dramatic clouds that HDR processing created.  I used another control point to brighten up the tree on the right that had come out too dark.
  3. Edited in Photoshop Elements to remove some severe lens flare created by shooting into the sun and some power lines in the distance.
  4. Edited in Nik Color Efex 4 to fix the clouds (they came out light brown), make the rolling hills more distinct, and bring out the "God Beams" of sunlight.  Also added a little dark vignette  around the edges.
I am truly blessed to live in such a beautiful part of the country, have such a great view right outside my back door, and have a God that creates such beauty each and every day.  I'm also thankful for my wife June who first pointed out the light and offered to finish the dishes while I went out and played. My photography would be dull and uninteresting without her spotting the shots for me.

Of course, you can buy prints of this photo online