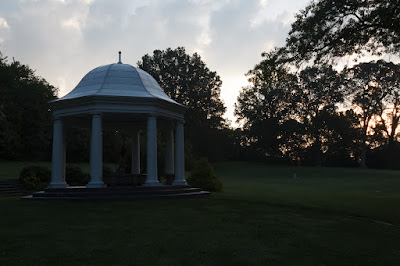
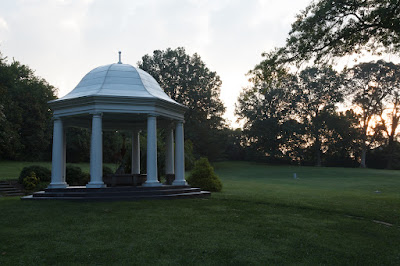
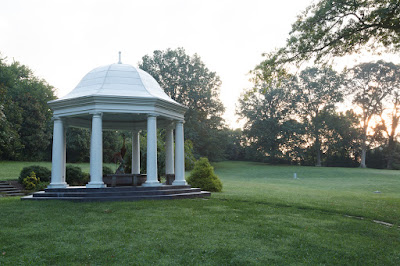
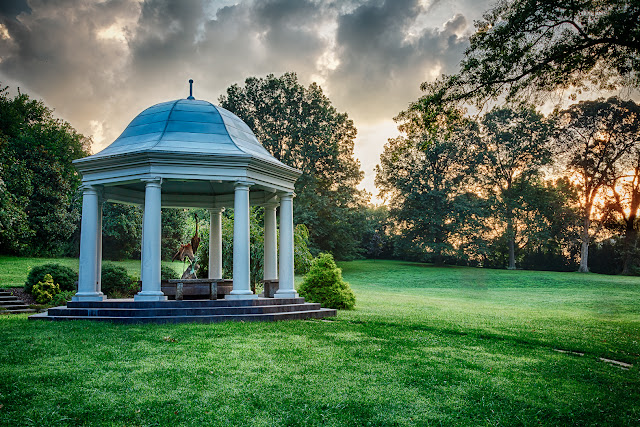
Showing posts with label photoshop. Show all posts

Sunday, March 14, 2021

New Option For Enlarging Digital Images

Rarely do I need to enlarge a digital photo.  My camera creates a 26 megapixel images that is 6240x4160 pixels. This is big enough to make a 20 inches by 30 inches. But, sometimes I have to crop an image down and end up with a much lower resolution photo.   Printing these cropped photos can create a print that is blurry or have blocky pixels.

In the past, I have used the Resize feature that comes as part of my On1 Photo RAW software to enlarge my images.  It has always done what I thought was a decent job. Recently I saw an article on a new feature in Adobe Photoshop called "Super Resolution" which claims to use Artificial Intelligence technology do double the dimensions of an image.  The author was pretty impressed so I decided to give it a try myself.

I did a couple tests comparing the result from On1 Photo RAW and Adobe Photoshop.  The best example is this photo of a Puffin taken in 2019 using a Fuji X-T3 and a XF18-135mm zoom lens at f/5.6 and ISO 400.

Unedited RAW Image

For the comparison I doubled the dimensions of the image to 12480x8320 using each program.  I then ran the result through the Topaz Denoise AI, which cleaned up some graininess and sharpened the photo a little.  I then saved each version as a full resolution TIFF file for comparison.

Click on the side-by-side comparison to zoom in.


The On1 versions on the left exhibit the "wormy" effect that can be created by Fuji cameras.  The Photoshop versions on the right don't have this problem and appears to be a much better image when viewed at 100%.  Because the Topaz Denoise AI software does a great job at removing the wormy noise from Fuji RAW files I decided to repeat my test running Denoise AI before enlarging.


Even when zoomed in to 100%, it's hard to spot the difference between the On1 Resize and the Photoshop images.  I've only done the comparison on a couple images.  There may be cases where one program or the other will work better depending on the image.  

The Photoshop Super Resolution tool only doubles the dimensions of the image.  The On1 Photo RAW Resize tool allows you much more control to create an enlargement to your desired dimensions.

Perhaps the best application for enlarging an image is when you have had to crop down because you just couldn't zoom in enough.  The example below was cropped down to 2920x1947 or 5.6 megapixels.  I used Photoshop to enlarge it to 22.7 megapixels.  I could make a reasonable quality print of this at 26x17 inches.

Photoshop Super Resolution or On1 Resize are tools I won't use very often, but when I need them I can pull them out and possibly solve a resolution issue.

Friday, July 14, 2017

An Easy Photoshop Trick for Blending Exposures

Our eyes are amazing creations and in most cases, far superior to a film or digital camera.  Our eyes are able to look around a scene and dynamically adjust based on subject matter. This trait accounts for many of our commonly understood advantages over cameras. For example, our eyes can compensate as we focus on regions of varying brightness, can look around to encompass a broader angle of view, or can alternately focus on objects at a variety of distances.

Cameras capture a single still image.  Some adjustment to the image can be done after capture with photo editing software, but that is limited by the camera technology.  If areas of our photo are too bright (blown out) or too dark then no information will be available in those areas, no matter how much we try to fix the image.

Our eyes are more akin to a video camera — not a still camera.  Our eyes and brain work together to compile relevant snapshots to form a mental image. What we really see is our mind's reconstruction of objects based on input provided by the eyes — not the actual light received by our eyes. As a result, we can see into dark and light areas of a scene at the same time.

There are techniques for overcoming the limitations of our digital cameras to try and simulate what our eyes see.  One of the most popular is High Dynamic Range or HDR.  Even our cell phones can do HDR now.  However, the result can look unrealistic or even cartoonish.  Recently I have been using image masking in Photoshop that can produce more realistic results.

Warning - this works in Photoshop.  If you don't have Photoshop you may not be interested.  If you are, please read on.

1. Make a series of photos using exposure bracketing.  You want the darkest shot to have no blown highlights and the brightest shot to have no underexposed areas.   I set my camera up to take 5 exposures at - 2 2/3, -1 1/3, 0, +1 1/3, and +2 2/3 EV.  Most DSLRs support bracketing. You may have to find and read your manual to make this work.  You should have your camera on a steady tripod to make sure the images line up.


-2 2/3 EV


-1 1./3 EV

0 EV

+1 1/3 EV


+2 2/3 EV

2. Load the five images into Lightroom.  You can use other photo editing tools.  Lightroom is what I use.

3. Pick enough of the bracketed shots to cover the dynamic range by looking at the histograms. The histogram on the darkest one should not be touching the right side.  The histogram on the brightest should not be touching the left side. 

First Shot

Third Shot

Use control-click in Lightroom to select those images and any in between.

4. In Lightroom, choose the Photo menu, Edit in and Open As Layers In Photoshop...  This will launch Photoshop and bring the images in as individual layers.

5. Drag the layers around to put the brightest on top and the darkest on the bottom.


6. Click the eye icon to the left of the layer to turn off all but the bottom two layers.  In this example, I only have 3 layers.

7. Click the second to the bottom layer, then click the Add Layer Mask icon.

\

8. With the layer mask on the second to the bottom layer selected, go to the Image menu and select Apply Image.
A dialog box will appear.  Click the Invert box and click OK.

Photoshop will create a layer mask for you that masks out the brightest parts of the top image. You can click the eye icon on the second to the last layer to turn in on/off to see the effect.

9. Turn on the next layer up by clicking on the eye icon and then repeating steps 7 and 8.  Do this for each layer.

I will sometimes paint in some additional masking on some layers to brighten or darken areas of the photo.

The resulting image will be low contrast and will appear flat and uninteresting.  You'll fix this in Lightroom.

10. You can save the image as is with the layers or flatten the layers before saving.  I flatten the layers this to make the files a little smaller and save space.  Close the file in Photoshop.  It will appear in Lightroom along with the originals.

11. Use Lightroom Tone sliders to darken the backs, lighten the whites and add some contrast.   Be careful to not reintroduce blown highlights or dark shadows. At this point, you can do what ever additional edits you want.  In this example I used the Vertical Transform slider to correct some of the perspective distortion, and added a little clarity.

This example does not have extreme contrast to deal with.  I have used this technique in some extreme situations, such as the sunset example below.

Exposed for the sunset sky

A little brighter

Exposed for the flowers in the foreground

End Result

I hope this is helpful for a few people who use Photoshop.  There are other techniques, such as Luminosity Masking, which are even more powerful but are much too complicated to explain here.  I have found I can use Image Masking in most cases.

Friday, September 2, 2016

First try using non-HDR techniques

High Dynamic Range or HDR is a popular technique for handling situations where the difference between the brightest and darkest parts of a photograph is too great for a digital camera to handle.   HDR is so popular that it is built into cameras and even cell phones.  However, HDR can produce images that appear unnatural.   This may be fine for some subjects, but it's not typically a good choice for landscapes.  

Here's a recent example.  I took the following three images
1 1/3 stops under-exposed
Default exposure
1 1/3 stops over-exposed
Using the Google Nik HDR Efex Pro software I created an HDR image from these three.
HDR Image
I used settings in the HDR software to create a result that was as natural as possible.  I then used On1 Effects software to apply some filters to take away some of the harsh look in the image.  As you can see, the HDR image just doesn't look right.

I then tried a new Photoshop technique called Apply Image Masking.  I learned this from a recent article on the Light Stalking website.   In less than one minute in Photoshop, I created what I think is a much more realistic image. I then applied the same On1 Effect filters.  Here is the end result.

Apply Image Masking in Photoshop
Click on one of the images above and you will be able to use arrow keys to flip between the different versions.

I think I have found a new go-to tool for my image editing toolbox that I will use instead of HDR. This will not work for all situations.   If there is movement between the different images, such as a person walking or trees blowing in the wind, defects will be produced that look like ghosts.

I love learning new things and the realm of digital photography is always changing.   I wonder what I will learn today?

Sunday, August 25, 2013

How to get both motion stopping and bluring shutter speeds in one image

If you've looked at my online photo gallery, especially the Waterfalls section, you know I enjoy photographing moving water.  My favorite technique is to use a slow shutter speed to make the flowing water appear silky and smooth.  Unfortunately, sometimes other elements in my photo that I want sharp are also moving.  This is especially challenging at the bottom of waterfalls because the falls themselves can produce a nice steady breeze that keeps the foliage in constant motion. 

I have recently started using a technique that keeps elements sharp that I want sharp and blurs the parts I want blurred.  This technique involves taking two exposures at different shutter speeds and blending them into one photo using photo editing software.  This is more advanced editing than I typically do on a photo but it can produce beautiful results.

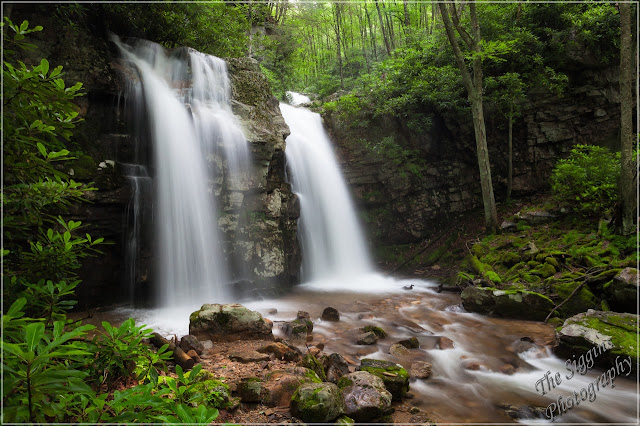
Here's a recent example where I used this technique.

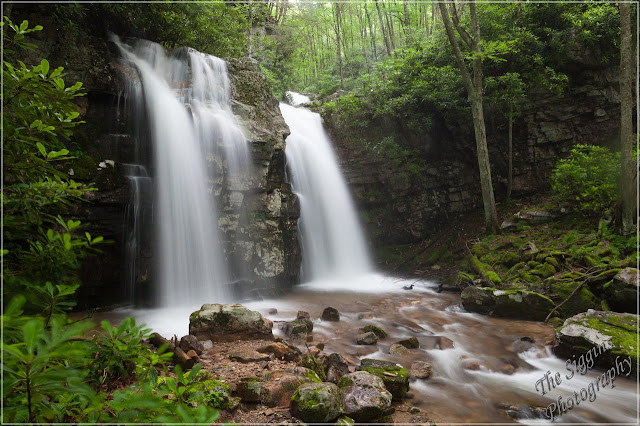
1.6 sec, f/20, 24mm, ISO 800
As you can see in this first photo the long 1.6 second exposure produced the pleasing blurred water effect I was wanting but the rhododendron leaves on the left were moving and blurred.  Most of the leaves around the base of the falls were moving but the movement of those that were further from the camera were not as noticeable.  I could have solved this problem by stepping to the right so the moving rhododendrons were not in my photo, however I wanted to include them because they framed the falls and also added a sense of depth to the photo.

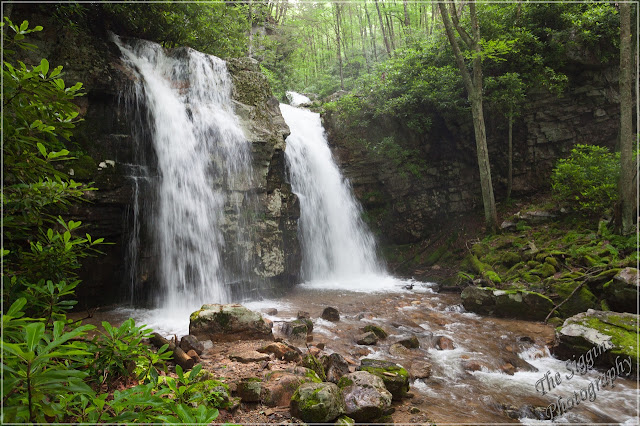
1/30 sec, f/4, 24mm, ISO 1600
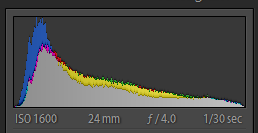
Without moving the camera I changed the settings to get a shutter speed that was fast enough to keep the rhododendron leaves sharp.  Because it was pretty dark under tree canopy I had to bump up my ISO to 1600 and open up my lens aperture to f/4 to get this speed.  Because I am going to blend these two photos together when I get home the tonality (brightness) of the two exposures need to be as close as possible.   If one photo was much brighter than the other it would look unnatural when blended.   I managed the tonality by shooting in Aperture Priority (Av) mode and letting the camera set the shutter speed accordingly.  I could have done the same thing by setting the shutter speed in Shutter Priority (Tv) mode and letting the camera adjust the aperture.  I verified the tonality of the two exposures were close by comparing the histogram for each on the back of my camera.

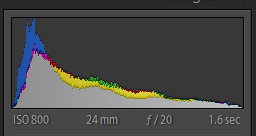
Histogram for first exposure

Histogram for second exposure
A histogram is a simple graph that displays where all of the tonality or brightness levels contained in the image  are found, from the darkest on the left to the brightest on the right.  You can see the two histograms above are not exactly the same but they are about as close as they can be in an environment where the lighting conditions are constantly changing.  Another important thing to remember is to take your two shots as close together as possible to minimize changing conditions.  If the sun had come out from behind the clouds between the first and second exposure then the tonality might have been very different, which would make blending later more challenging.

To use this technique you also need to make sure the white balance is the same between the two photos.   You can do this by not using auto white balance and setting the white balance on the camera or shooting in RAW mode and setting the white balance using photo editing software.  Since I pretty much shoot RAW all the time I didn't worry about setting the white balance on the camera.

When I download the photos into Adobe Lightroom I have two photos that are almost identical except for the shutter speed.  I need to take parts of each photo and blend them together into a new photo.  I used Photoshop Elements version 11 to do this.  You can use Photoshop for this, but I prefer Elements because it does everything I need and is only $65 versus over $600 for Photoshop CS6.

The blending technique using layers in Photoshop Elements is a bit advanced and more than I can cover here.  There are many free resources online that explain how to use layers.  Here are two video tutorials that are helpful:
In Photoshop Elements I created two layers from the two exposures and used the layer mask tool to reveal the rhododendron leaves from the second photo while preserving the rest of the photo. Instead of using a gradient tool like in the tutorial, I used the black paint brush over the leaves.  I was careful to not paint over the water, which would have revealed the water from the second photo, which I didn't want.

These two photos were pretty easy to blend together using layer masks because there was good separation between the leaves and the water.   If the water had been behind the leaves the layer mask would have been tedious and time consuming to create.   This is something to remember when composing the shot.

I saved the blended photo as a new file then used Lightroom to adjust the contrast, clarity, saturation, sharpness, and add a vignette. 
New Blended Photo
Once you had done this a couple times you will find it's pretty easy, as long as you think about blending when taking the photos.  Four things to remember -
  • No camera movement between shots - camera on a tripod.
  • Tonality of the two images as close as possible - shoot quickly.
  • Two images must have the same white balance.
  • Compose to minimize visual overlap of the elements to be blended.
Please let me know in the comment box below if you find these tutorials helpful and if there are others you would like to see here.  Feel free to share on facebook, Google+, etc.

Friday, January 25, 2013

Is it real or is it Photoshop?


I recently saw an article on the 10 Myths About Photography by  Scott Bourne---Photo  Focus. 

Number 5 caught my attention - "If you do anything to a photo in Photoshop it's no longer a photo. Opinion - if it started its life in a camera it's a photo. Ansel Adams never used Photoshop, but he manipulated the Hell out of his pictures. There is no reality in photography. There never has been. It doesn't exist"

People ask me if I edit my photos.  The answer is yes.  I edit every photo I take.

A photograph is a two dimensional representation of a 3 dimensional world.   Photographers can arrange their composition to give more of a three dimensional feel but it's still on a flat screen or piece of paper.   They can make changes using Photoshop, Lightroom or other photo editing programs to make it look like it has depth.  They can also manipulate the photo to make it more pleasing.   How much editing is OK and where is the line?

Almost all digital photos have been manipulated. In fact, unless you take your photos in RAW mode, they have been manipulated by your camera before you see them.   By default cameras automatically adjust the color, sharpness, contrast, saturation, and possibly other photo settings.  This is done automatically, unless the camera has been set to store the images in RAW mode.  RAW images are uncompressed and unprocessed by the camera.  


The first version of this creek picture is the unprocessed RAW image.   It's not a bad photo but it lacks something and also has something I don't want.   The second version is edited in Adobe Lightroom to adjust to white space (color), vibrance (saturation), contrast, and sharpness.  I also darkened the trees at the top and darkened around the edges slightly.   These changes emphasize the flowing water and give the colors a little more pop.   In the original there was a twig sticking out of the water that was very distracting.   I used Photoshop Elements to digitally remove it.

Click the first image and you will get a window where you can go back and forth comparing the two versions.

If I had my camera on automatic it would have done some of these adjustments, such as white space, vibrance, contrast, and saturation, for me.   I prefer to turn off the automatic adjustments and adjust each one.

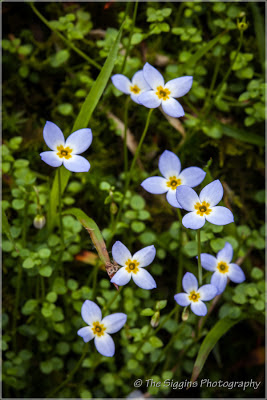
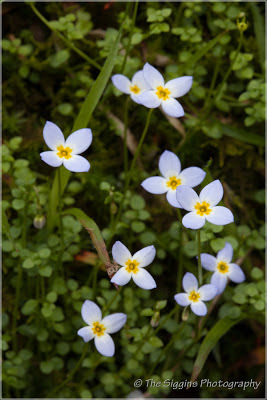
Here's another example of editing a RAW photo.   The first image is the unmanipulated copy and the second has been edited in Lightroom.   The color of the Bluettes is the edited version are more like what I saw.     I also darkened the corners and edges to draw the viewers eye to the center.

This third example is a bit more manipulated.   The first version is straight out of the camera and pretty dull.   This was a really cool scene but the camera didn't capture it the way I saw it.   I first cropped and straightened the image to make sure the barn is the obvious subject.  I also increased the clarity to draw the trees out of the fog and brightened the barn, also to draw attention to it.    The white balance and vibrance were also adjusted.  There was also some large white object to the right of the barn that was very distracting so I "removed it".


Which of these is more "real"?  The more important question is which is more interesting to look at?   The first may be closer to what was actually there, but I think the second is a more interesting photo.  Unless a photo is intended for documentary purposes, it usually can benefit from some manipulation.   The manipulation is what painters have done for centuries and in fact many of the guidelines used by photographers were first discovered by painters.   Photographers are artists and as artists can adjust a photo any way they feel will improve it.