If you've looked at my online photo gallery, especially the
Waterfalls section, you know I enjoy photographing moving water. My favorite technique is to use a slow shutter speed to make the flowing water appear silky and smooth. Unfortunately, sometimes other elements in my photo that I want sharp are also moving. This is especially challenging at the bottom of waterfalls because the falls themselves can produce a nice steady breeze that keeps the foliage in constant motion.
I have recently started using a technique that keeps elements sharp that I want sharp and blurs the parts I want blurred. This technique involves taking two exposures at different shutter speeds and blending them into one photo using photo editing software. This is more advanced editing than I typically do on a photo but it can produce beautiful results.
Here's a recent example where I used this technique.
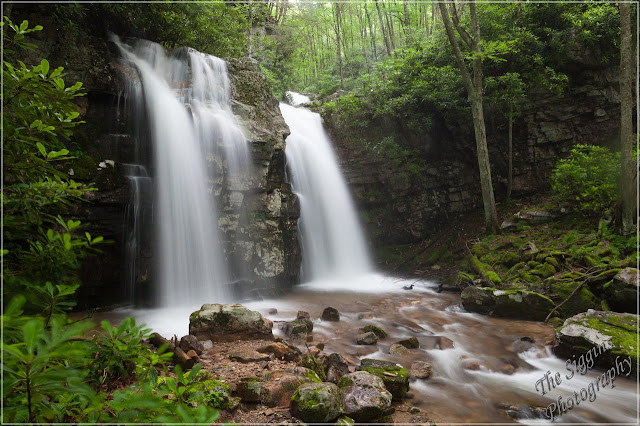 |
| 1.6 sec, f/20, 24mm, ISO 800 |
As you can see in this first photo the long 1.6 second exposure produced the pleasing blurred water effect I was wanting but the rhododendron leaves on the left were moving and blurred. Most of the leaves around the base of the falls were moving but the movement of those that were further from the camera were not as noticeable. I could have solved this problem by stepping to the right so the moving rhododendrons were not in my photo, however I wanted to include them because they framed the falls and also added a sense of depth to the photo.
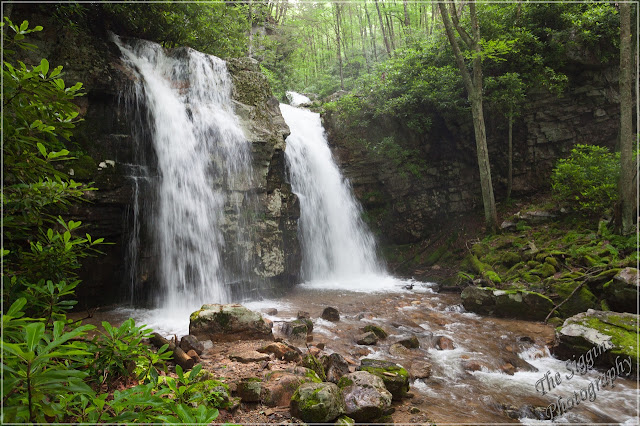 |
| 1/30 sec, f/4, 24mm, ISO 1600 |
Without moving the camera I changed the settings to get a shutter speed that was fast enough to keep the rhododendron leaves sharp. Because it was pretty dark under tree canopy I had to bump up my ISO to 1600 and open up my lens aperture to f/4 to get this speed. Because I am going to blend these two photos together when I get home the tonality (brightness) of the two exposures need to be as close as possible. If one photo was much brighter than the other it would look unnatural when blended. I managed the tonality by shooting in Aperture Priority (Av) mode and letting the camera set the shutter speed accordingly. I could have done the same thing by setting the shutter speed in Shutter Priority (Tv) mode and letting the camera adjust the aperture. I verified the tonality of the two exposures were close by comparing the histogram for each on the back of my camera.
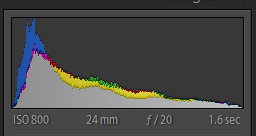 |
| Histogram for first exposure |
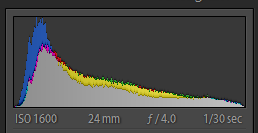 |
| Histogram for second exposure |
A histogram is a simple graph that displays where
all of the tonality or brightness levels contained in the image are found, from the darkest on the left
to the brightest on the right. You can see the two histograms above are not exactly the same but they are about as close as they can be in an environment where the lighting conditions are constantly changing. Another important thing to remember is to take your two shots as close together as possible to minimize changing conditions. If the sun had come out from behind the clouds between the first and second exposure then the tonality might have been very different, which would make blending later more challenging.
To use this technique you also need to make sure the white balance is the same between the two photos. You can do this by not using auto white balance and setting the white balance on the camera or shooting in RAW mode and setting the white balance using photo editing software. Since I pretty much shoot RAW all the time I didn't worry about setting the white balance on the camera.
When I download the photos into Adobe Lightroom I have two photos that are almost identical except for the shutter speed. I need to take parts of each photo and blend them together into a new photo. I used Photoshop Elements version 11 to do this. You can use Photoshop for this, but I prefer Elements because it does everything I need and is only $65 versus over $600 for Photoshop CS6.
The blending technique using layers in Photoshop Elements is a bit advanced and more than I can cover here. There are many free resources online that explain how to use layers. Here are two video tutorials that are helpful:
In Photoshop Elements I created two layers from the two exposures and used the layer mask tool to reveal the rhododendron leaves from the second photo while preserving the rest of the photo. Instead of using a gradient tool like in the tutorial, I used the black paint brush over the leaves. I was careful to not paint over the water, which would have revealed the water from the second photo, which I didn't want.
These two photos were pretty easy to blend together using layer masks because there was good separation between the leaves and the water. If the water had been behind the leaves the layer mask would have been tedious and time consuming to create. This is something to remember when composing the shot.
I saved the blended photo as a new file then used Lightroom to adjust the contrast, clarity, saturation, sharpness, and add a vignette.
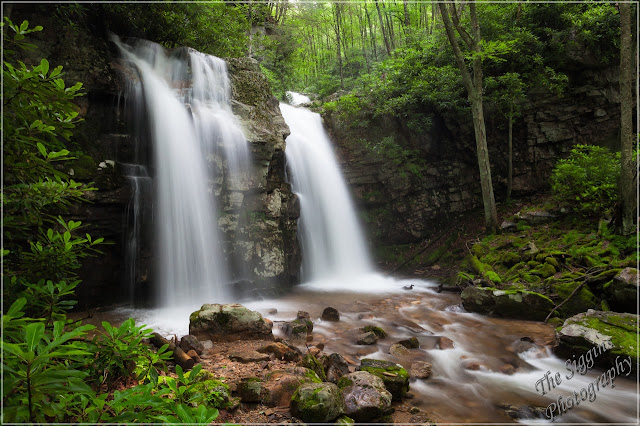 |
| New Blended Photo |
Once you had done this a couple times you will find it's pretty easy, as long as you think about blending when taking the photos. Four things to remember -
- No camera movement between shots - camera on a tripod.
- Tonality of the two images as close as possible - shoot quickly.
- Two images must have the same white balance.
- Compose to minimize visual overlap of the elements to be blended.
Please let me know in the comment box below if you find these tutorials helpful and if there are others you would like to see here. Feel free to share on facebook, Google+, etc.


